Quick and Easy Outlines in Blender
~ This article assumes that you have some basic knowledge with navigating and using Blender.
Quite often digital artists will use inverted geometry for outlines. This usually works well but isn't without it's drawbacks; Depending on the model it can be tricky and time consuming to set up and you'll sometimes get odd artifacts as the geometry intersects with itself.
So here's a quick trick to produce quick and controllable outlines to your 3D models entirely inside Blender's compositor;
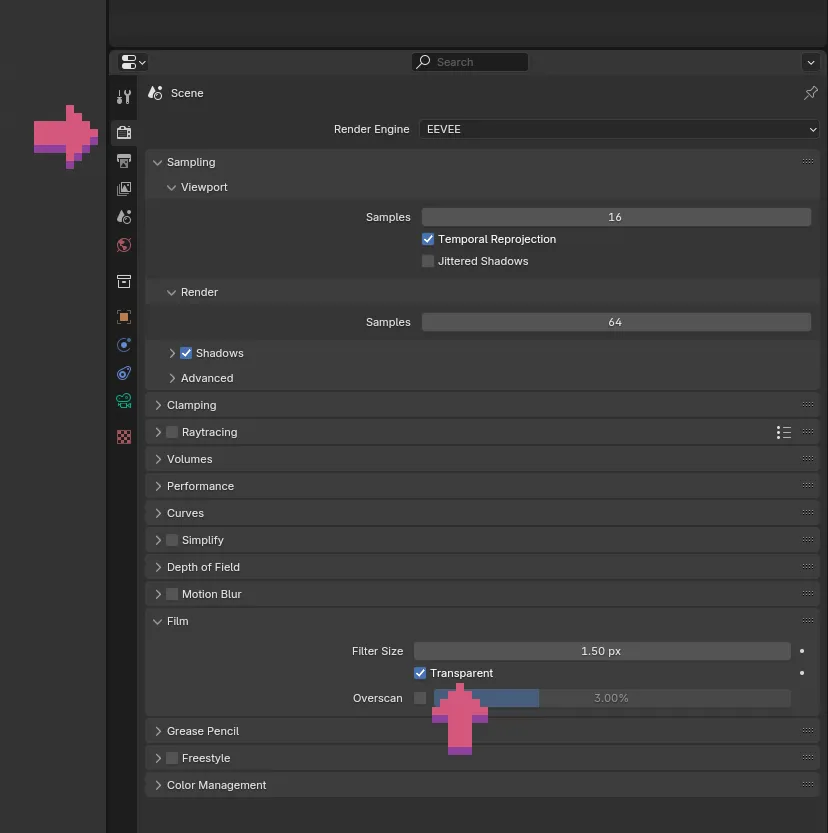
To get started you'll first have to make sure you image is being rendered on a transparent background. You can find this setting in the Render Tab of the Properties Window.
Underneath the Film section you can tick the Transparent box so the background environment will be replaced with full transparency instead. This should work with any of the render engines (We're using Eevee to demonstrate here).
Now we're going to head over to the compositor workspace, enable nodes and reproduce this simple setup:
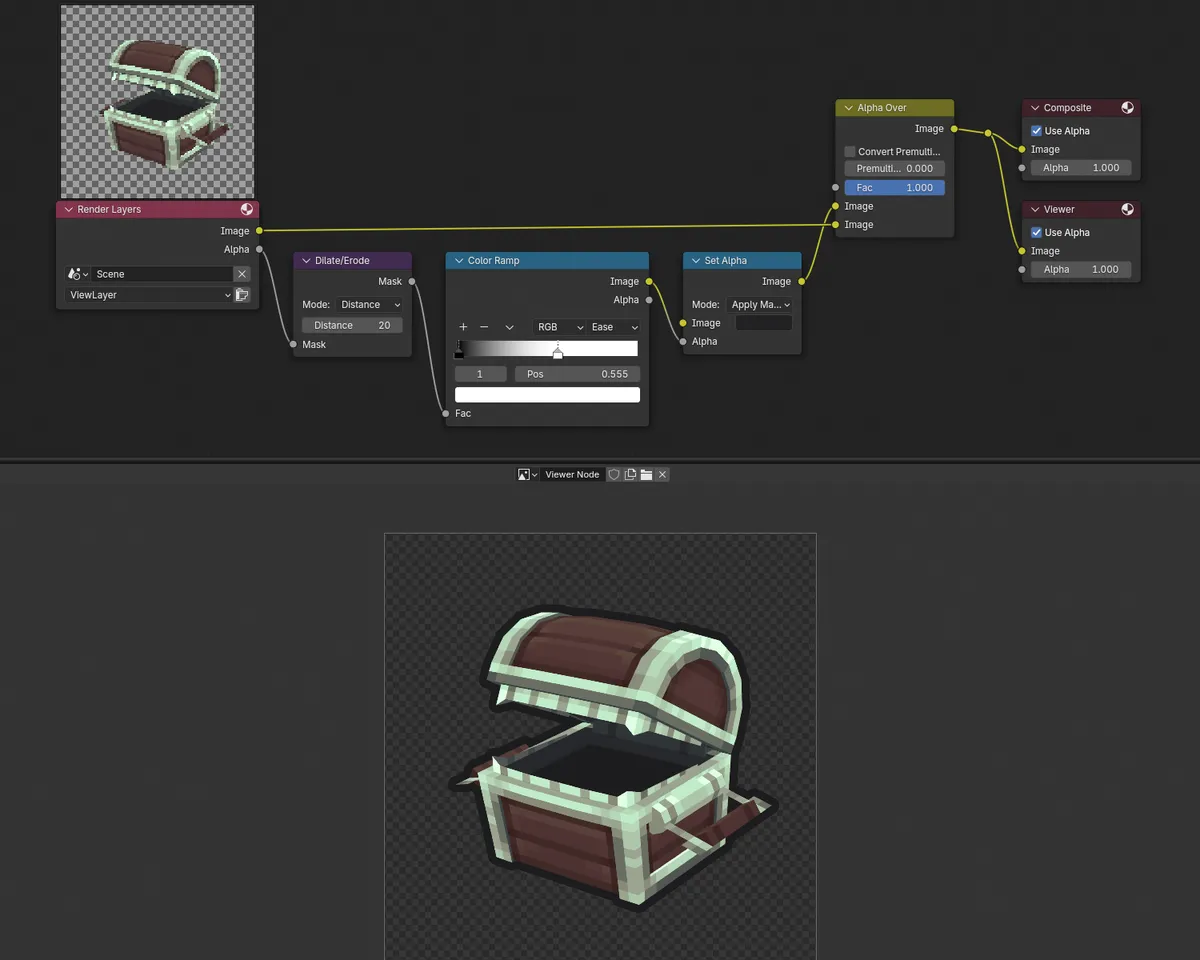
- The Dilate/erode node set to Distance allows you to control the thickness of the line.
- The Colour Ramp Controls the softness of the line, try experimenting with different easing types for different results.
- Changing the Colour (image) input in the Set Alpha node will control the colour of the outline.
We'll then use the Alpha Over node to overlay the original image ontop of the newly created outline.
And that's all it takes. For newer versions of Blender you can enable compositor effects in the 3D viewport so you can preview it in realtime.
A couple of drawbacks to consider:
If you wanted a background you'll either have to render it on a separate render pass and then composite it behind the image (especially if you're doing animations), or simply bring the image into your graphics software of choice and place a background in manually instead.
Also, where we're relying on the alpha channel, if you wanted multiple objects to have their own independent outlines then they will also need to be rendered on separate layers, outlined and then combined together again.
This method is much better suited for quick vanity outlines for smaller projects than stylistic choices for larger or more complex scenes.